Block unsupported countries with Conditional Access
The digital landscape is evolving, and with it, the risks are escalating. Every organization, irrespective of its size or domain, is a potential target for threat actors prowling the internet. In this precarious scenario, it’s imperative to arm your organization with robust security measures to minimize the risks lurking in the digital shadows. A proactive step towards this security enhancement is the deployment of conditional access policies.
Conditional access policies act as a gatekeeper, scrutinizing every sign-in attempt against a set of predefined conditions and deciding whether to grant or deny access. Implementing such policies can significantly bolster your organization’s security posture by ensuring that only legitimate users can access critical resources. What is Conditional Access
Below is a practical example of setting up a conditional access policy in Entra ID to deny access from unsupported countries, creating a more controlled and secure Entra ID environment for your organization.
Prerequisites
- Using this feature requires Microsoft Entra ID P1 licenses
- Access to any of the following roles Global Administrator, Security Administrator or Conditional Access Administrator - In order of most to least privileged.
Implementation
Navigate to https://entra.microsoft.com/
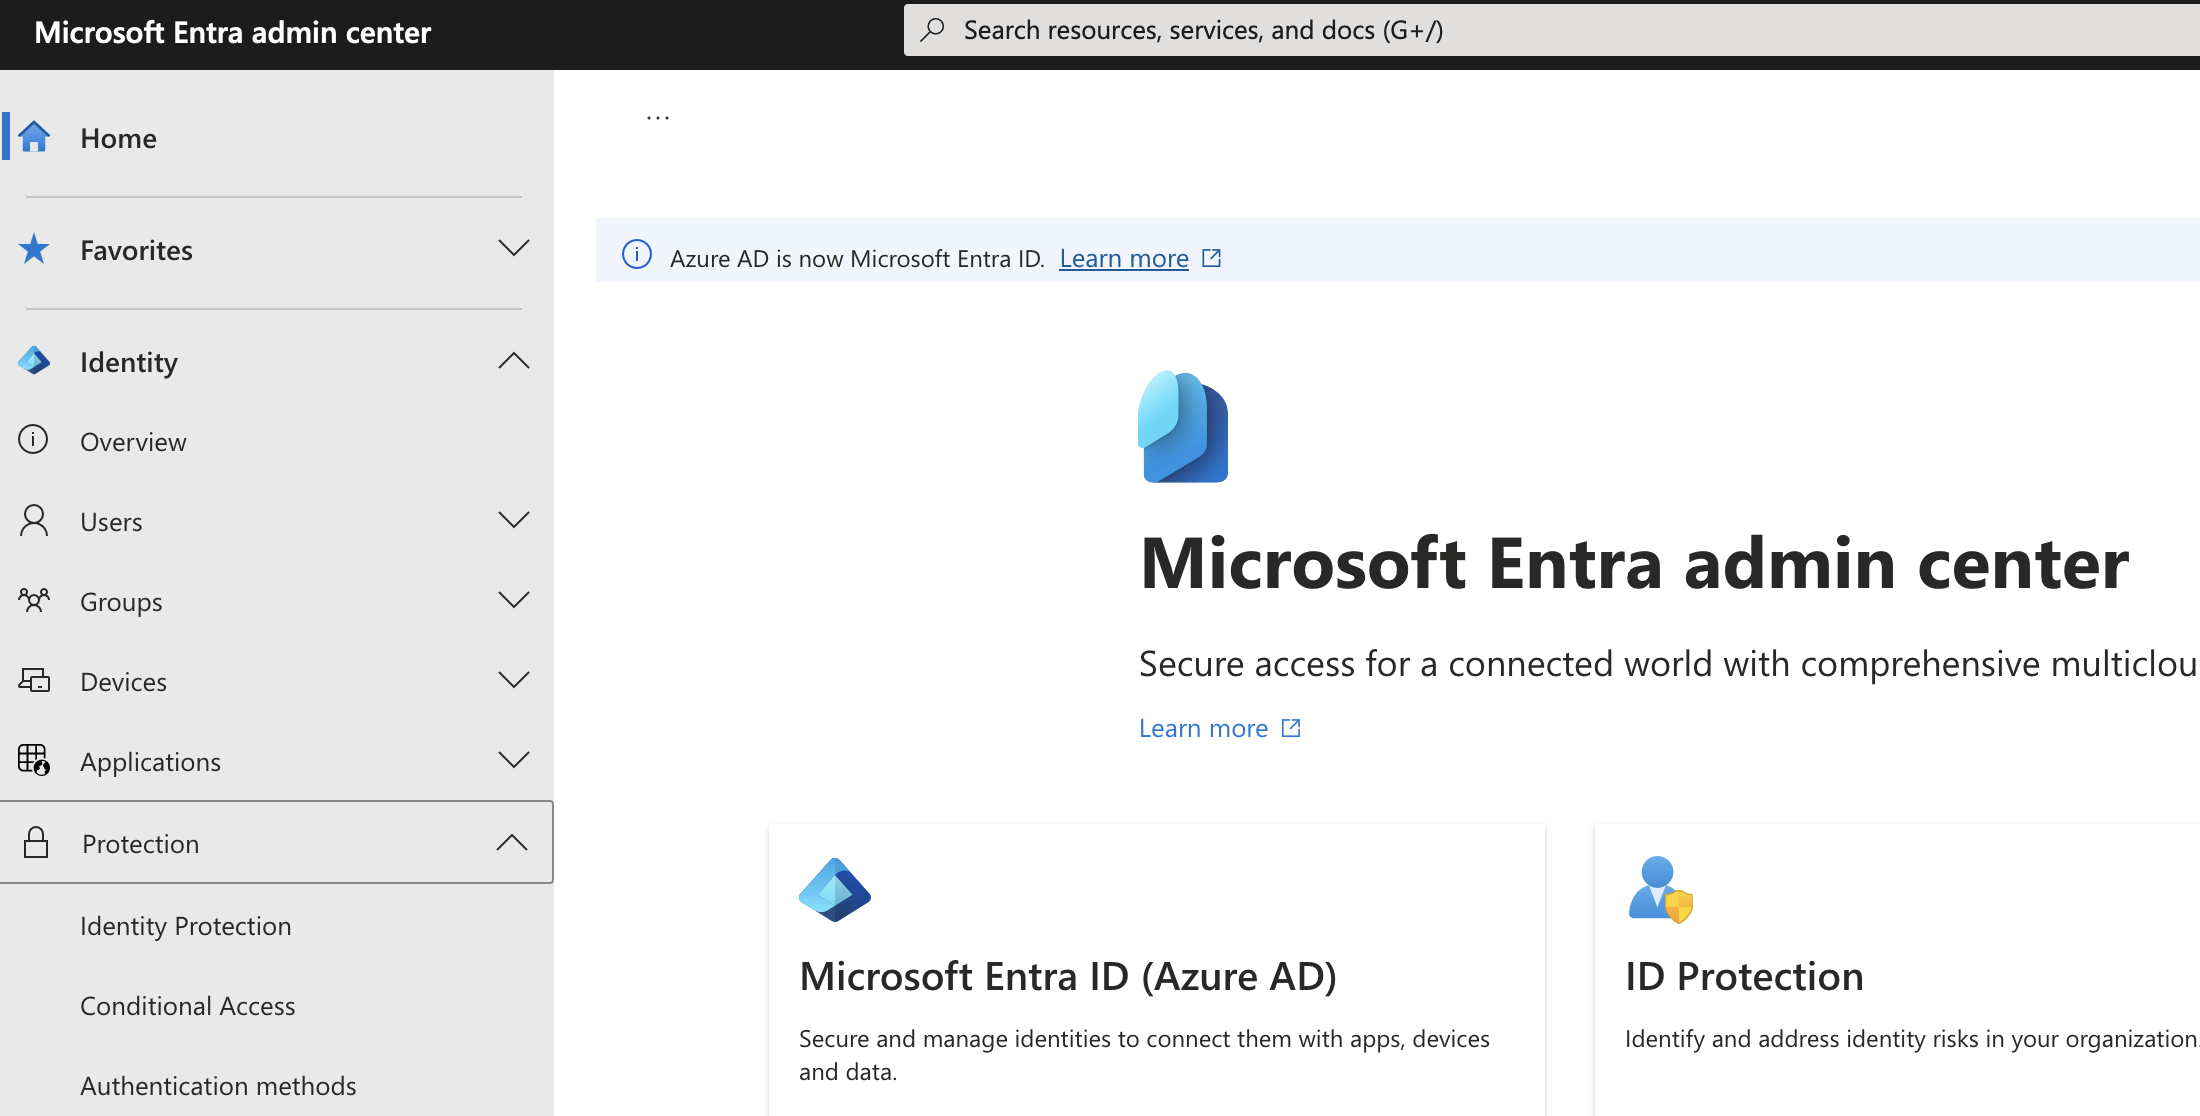
In the left hand pane select Identity > Protection > Conditional Access.
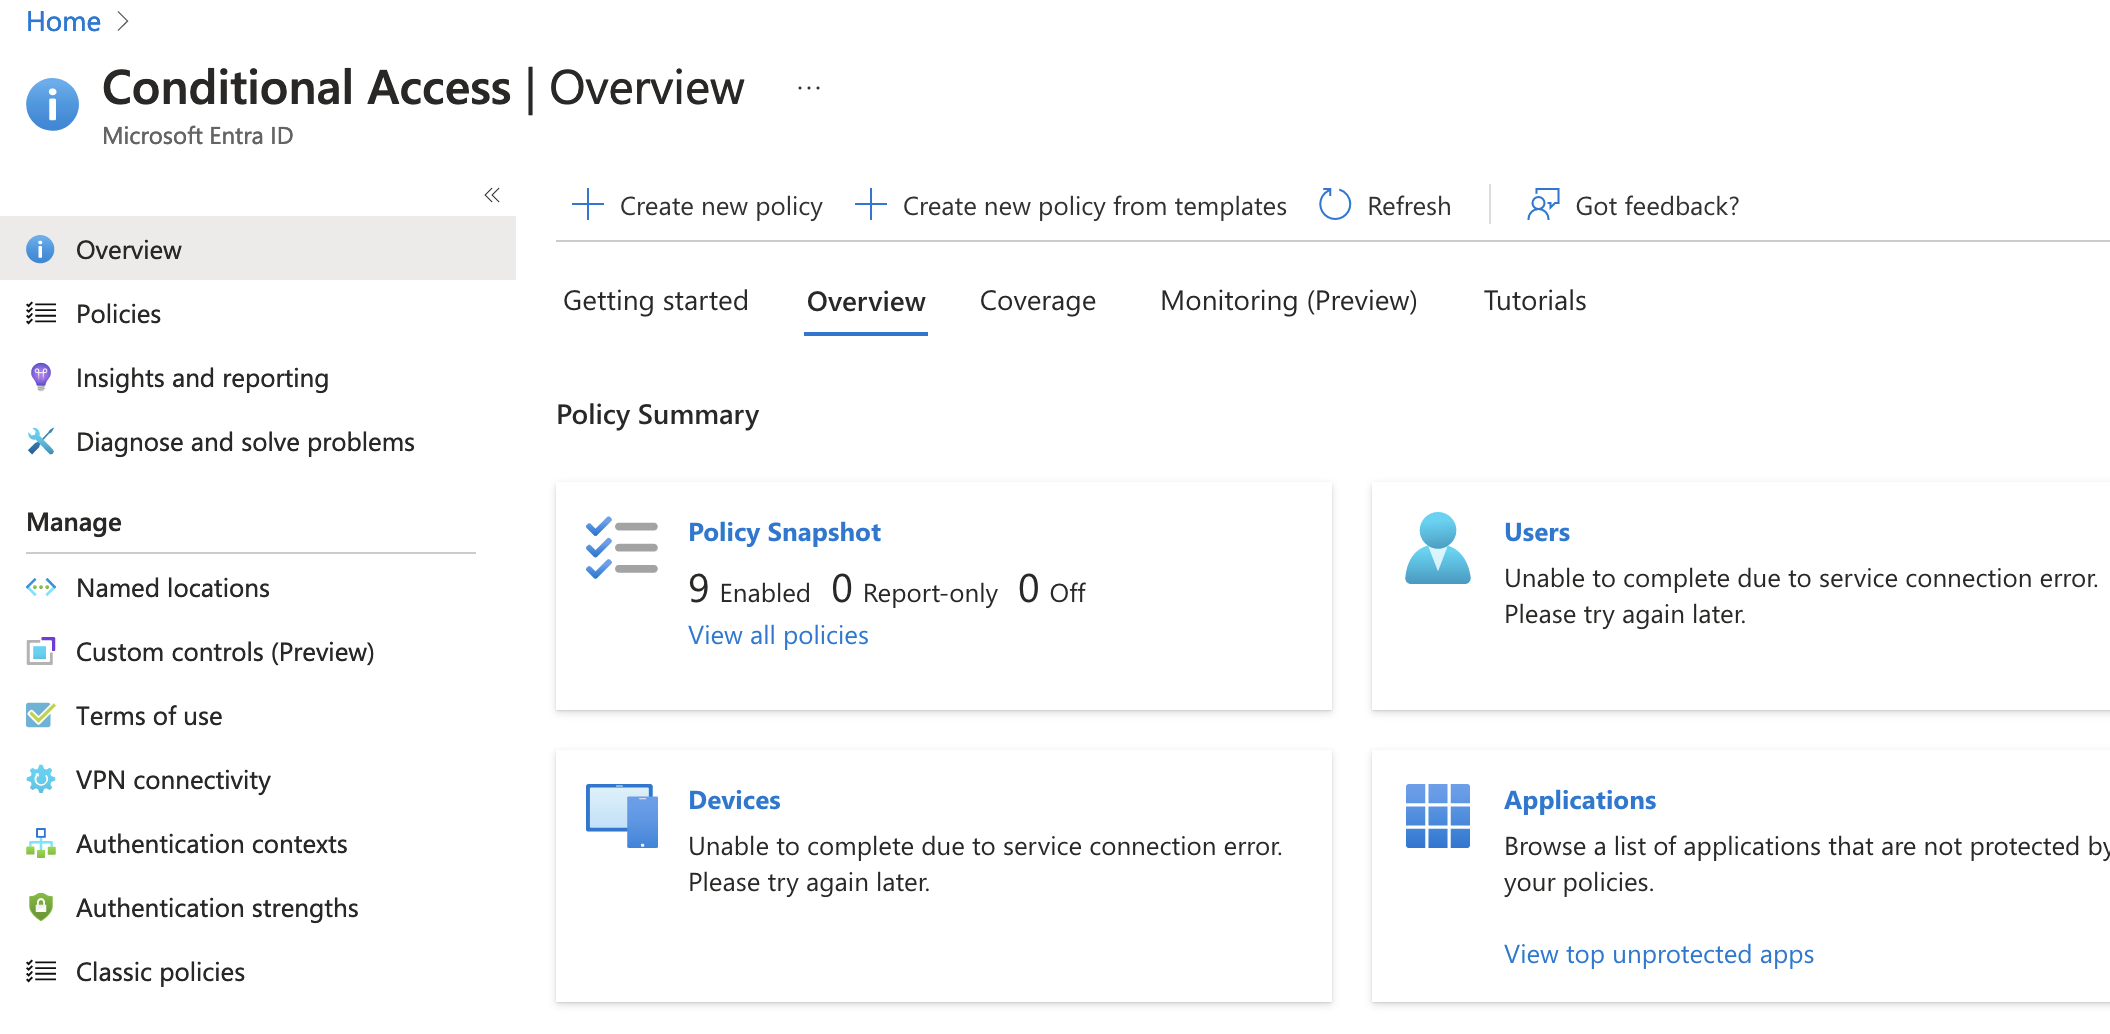
Once we’re on the Conditional Access page there’s a few options but since we’re blocking access to unsupported countries today we’ll want to navigate to “Named locations”
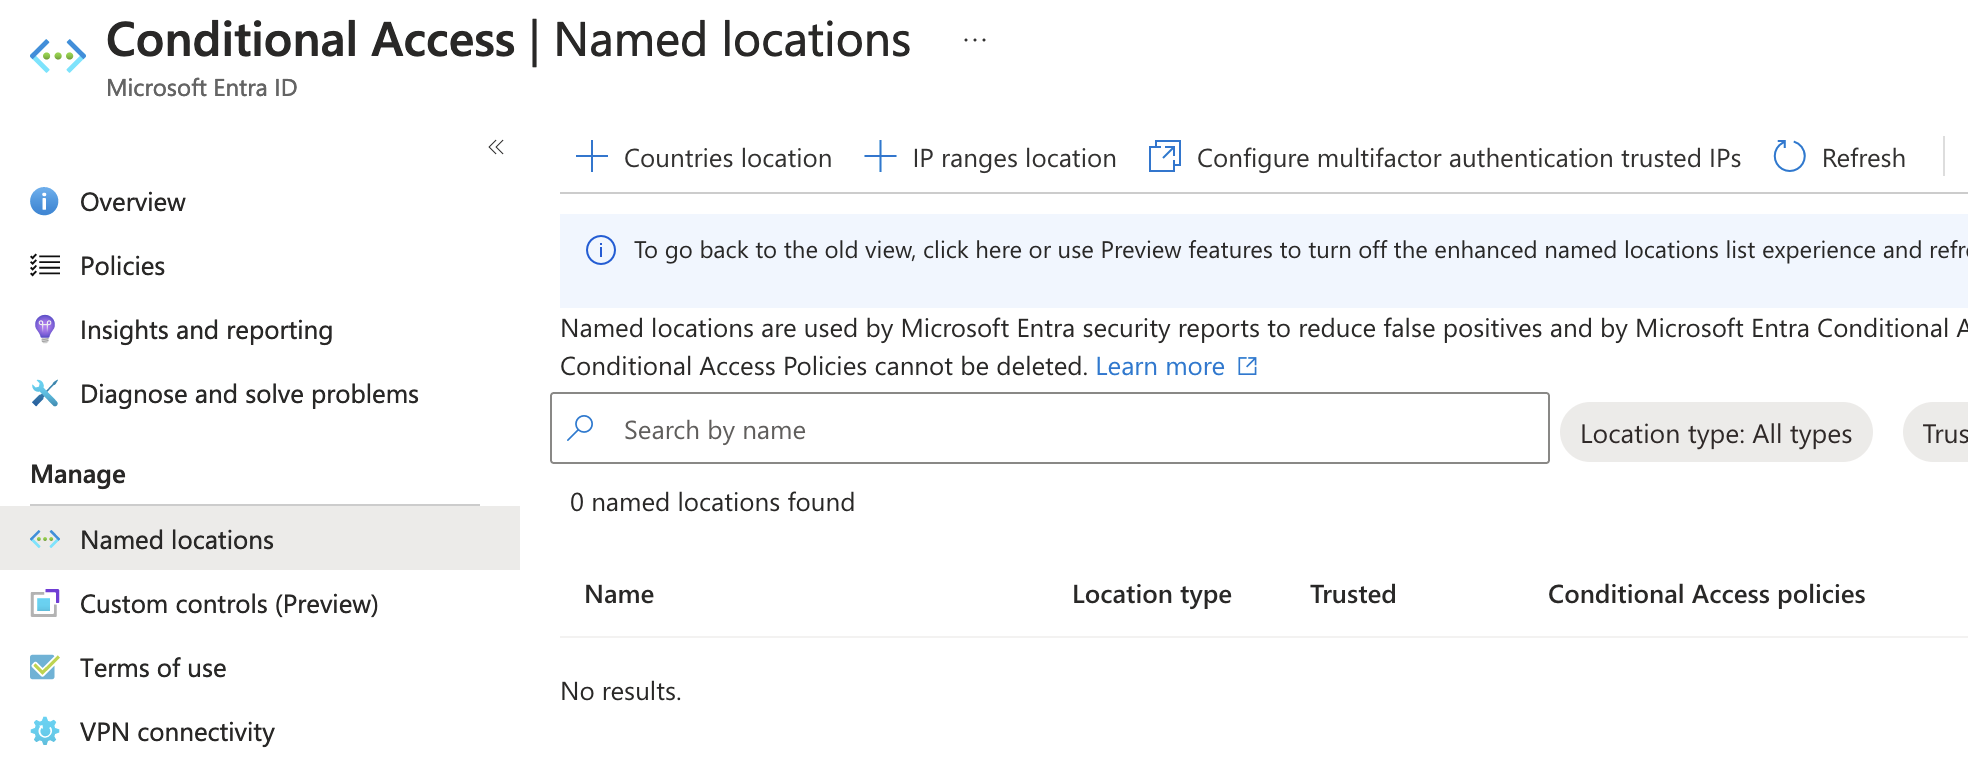
On the “Named locations” page there’s several ways to create a named location but for this exercise we’ll create a “Countries Location” by selecting the plus icon next to it.
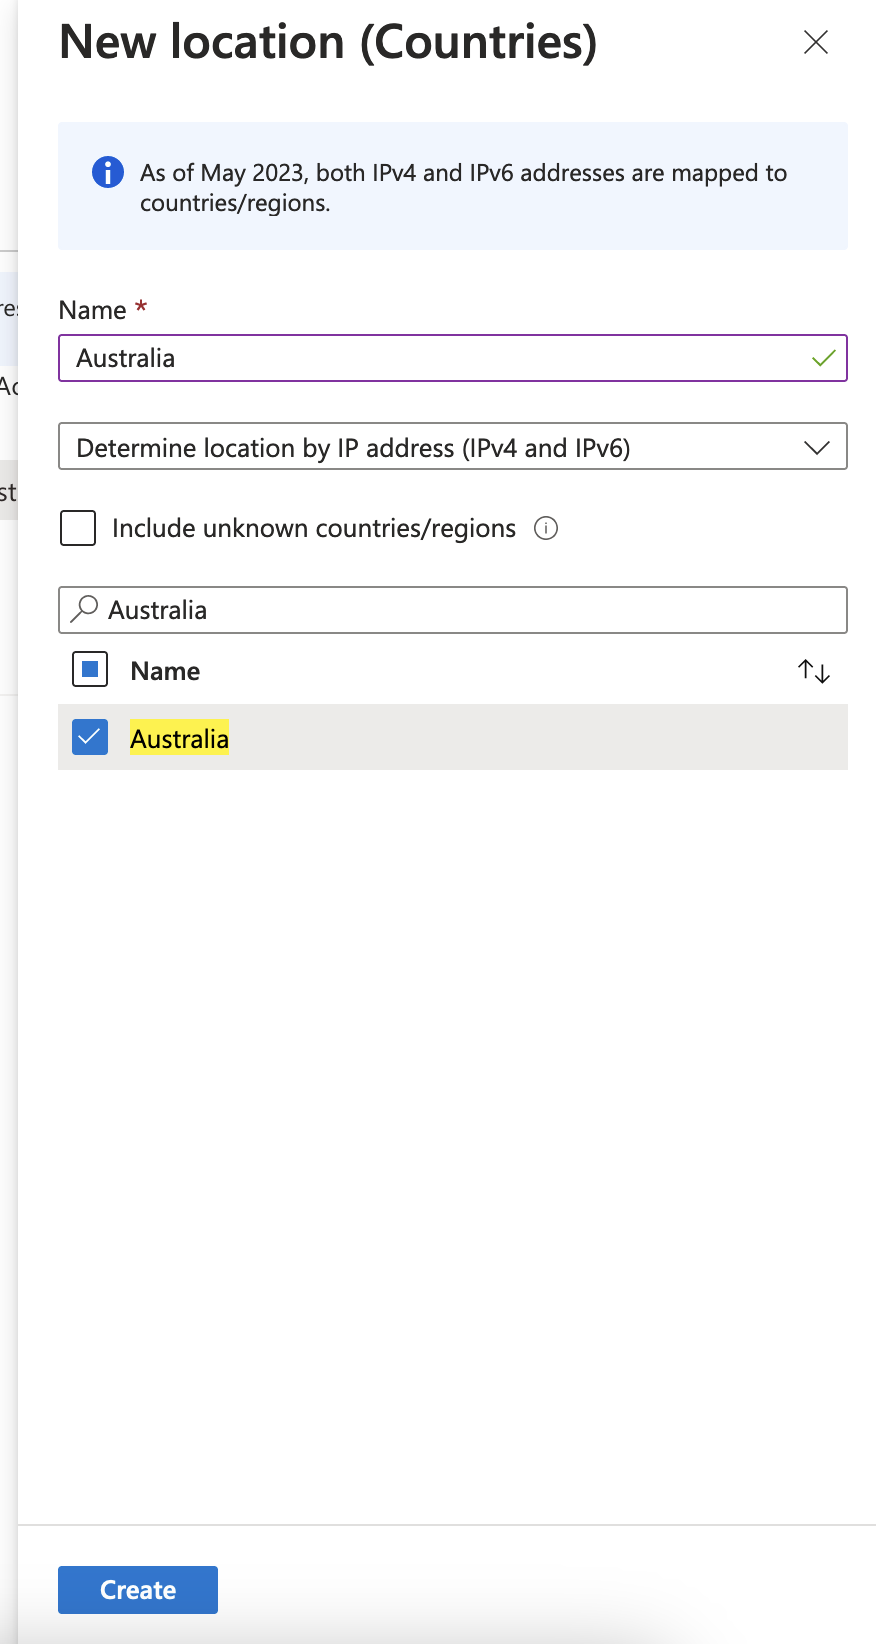
In the new location fly out that appears, input a name for your new “countries location”. You can add multiple countries per “countries location” but I prefer to only add one. Below I’ve named my location Australia and only selected Australia as the country. Select Create.
Once the location is created you’ll be able to view it along with a number of properties related to it. Notably the Conditional Access policies column is quite handy to set what locations are in use where.

Navigate to the Policies pane in the left-hand menu to view and create conditional access policies. Select “New Policy”.

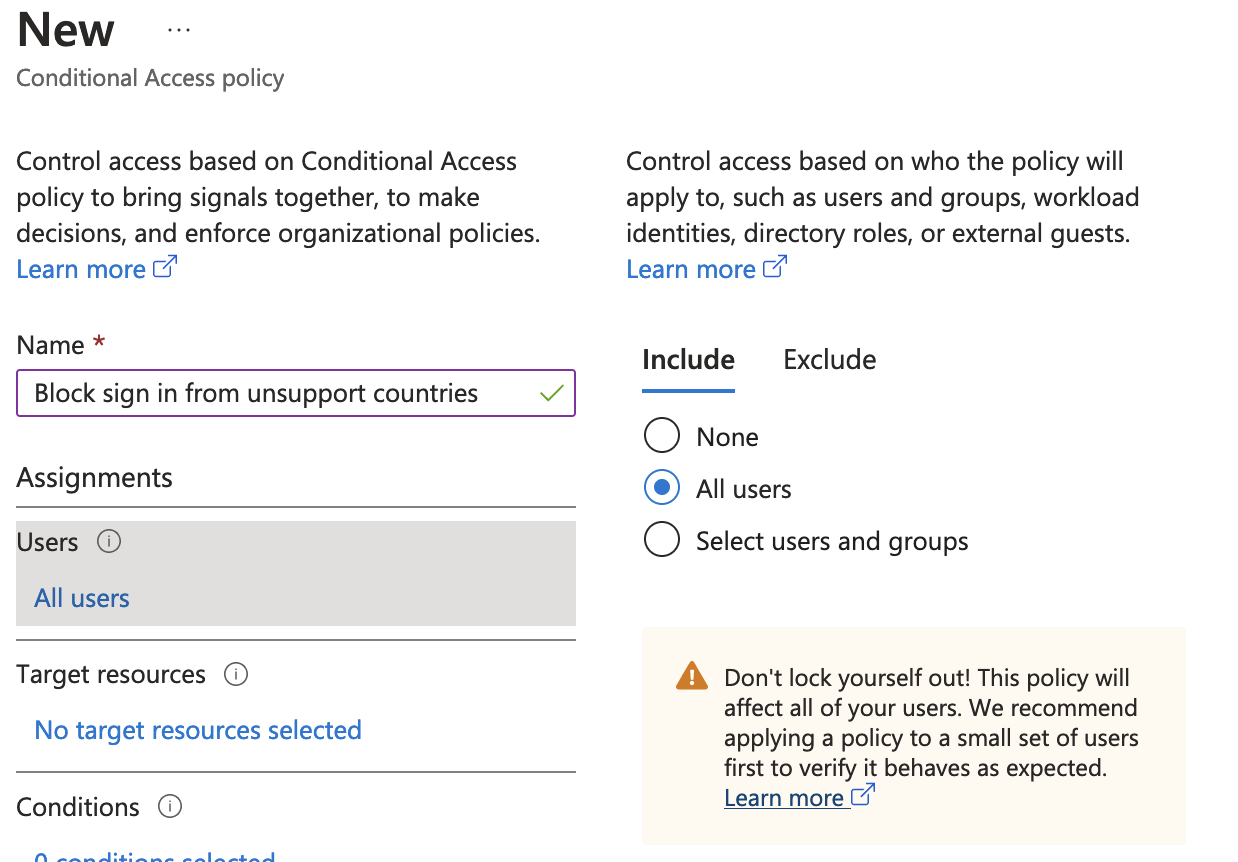
In the name for your policy select a meaningful name like “Block sign in from unsupported countries” then select Users. You can choose to apply the policy to a select group but it is much better to apply to all and create a group for exclusions.
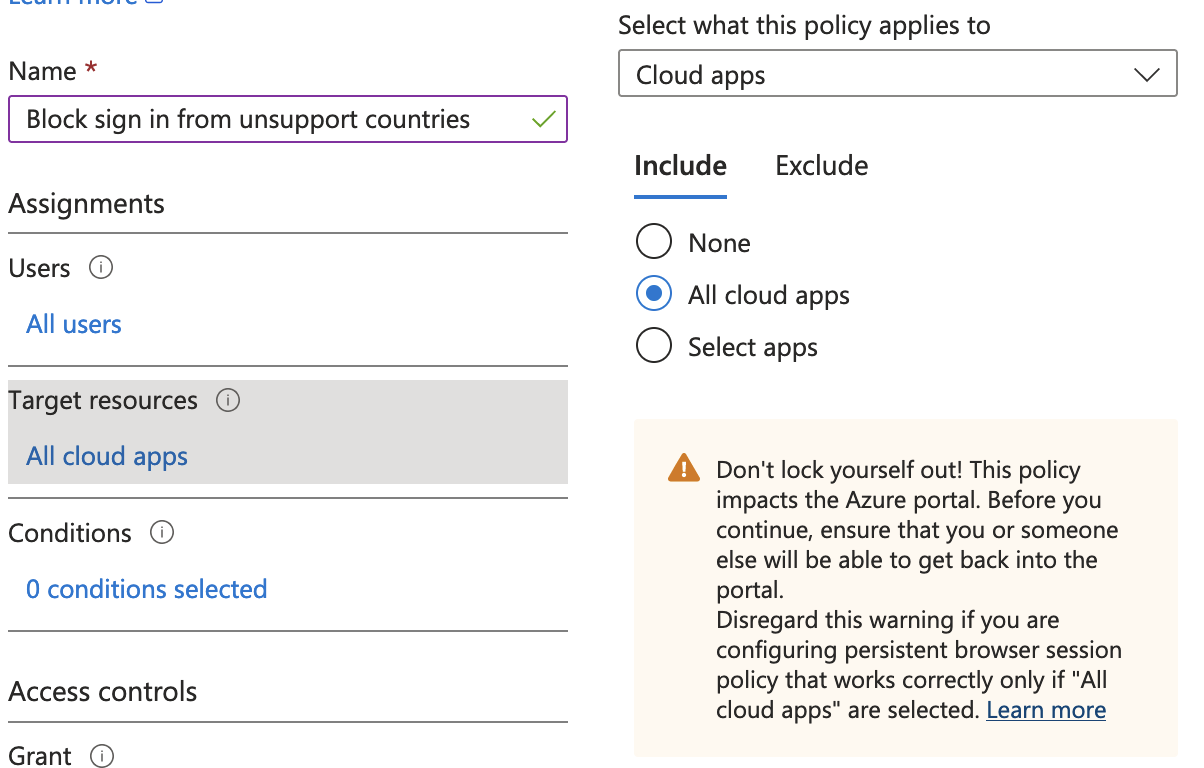
Under target resources set the include to apply to “All cloud apps”.
Under conditions Select > Locations > Configure = Yes > Exclude > Add the named location you configured earlier.

Next under Access Controls > Grant > Select Block Access. Once you’ve selected this a message in red may appear below stating that you may lock yourself out. I find that its always good practice to set a policy to “Report-only” then use the What If tool to verify whether it will work expectedly link to What If tool.
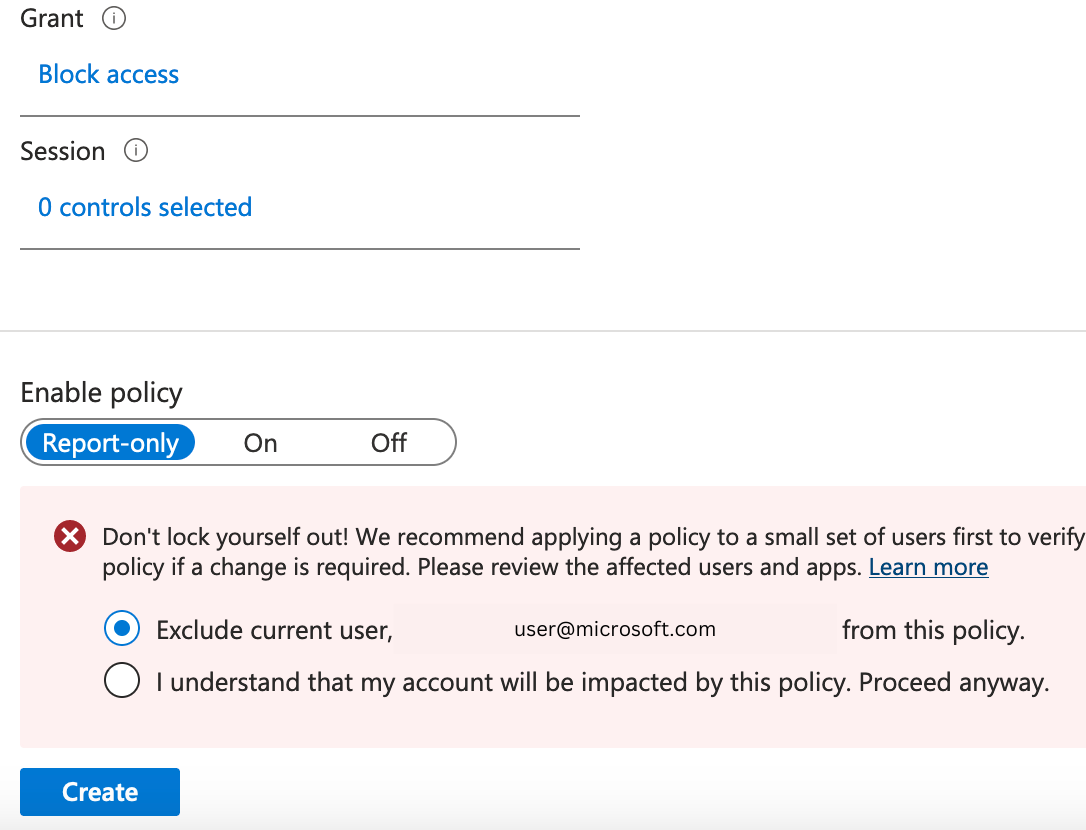
Enable the policy and Ta Da users will now only be able to sign in from countries that have been excluded from this policy.
If you have a circumstance where certain users require access from different countries I would recommend creating an additional conditional access policy that applies to the countries they need access from.
- Create the additional named locations for the countries they need access to.
- Duplicate the policy that applies to all users.
- Change the name of the new policy.
- Change the scope of the new policy from all users to only apply to specific users - any exclusions you had for users can be removed.
- Update the excluded locations to include the additional locations this user needs access from.
- Create the policy.
- Exclude the users included in this policy from the policy that applies to all users.
Conclusion
Utilising Conditional Access in Entra ID to block sign-ins from unsupported countries is a straightforward yet impactful measure to enhance your organization’s security. This step significantly minimises potential threats and paves the way for a controlled and secure digital environment. Keep exploring and fine-tuning these settings to better suit your organisational needs, maintaining a robust defense against evolving cyber challenges.
