Creating your first pipleline
Written on October 26th, 2023 by Jono
Today we’re going to create our first pipeline, I have previously used pipelines but never tried to create one from scratch. So what’s a pipeline anyway? A pipeline in software development is almost like an assembly line in a factory where each station or stop along the way adds something to the product. Likewise, in a software pipeline code moves through multiple stages like building, testing, and deploying, with each stage adding value or ensuring quality. Pipelines and Continuous Integration/Continuous Deployment (CI/CD) collaborate extremely well together to use automation and a structured framework for blending code and rolling out applications smoothly.
Prereqs
We’re going to be using a few things throughout this journey.
- Jenkins Jenkins is an open-source automation server that aids in building, testing, and deploying code, forming a key part of many Continuous Integration/Continuous Deployment (CI/CD) pipelines. https://www.jenkins.io/download/
- GIT Git is a version control system that helps track changes in code during software development, allowing multiple contributors to work together efficiently on a project. https://git-scm.com/downloads
Getting started
Let’s first get Jenkins and GIT installed, the install process is pretty straightforward and if you’re on a Mac it shouldn’t be more than.
$ brew install jenkins-lts
and
$ brew install git
Creating our Pipeline
First start the Jenkins service, on Mac this can be via brew.
brew services start jenkins-lts
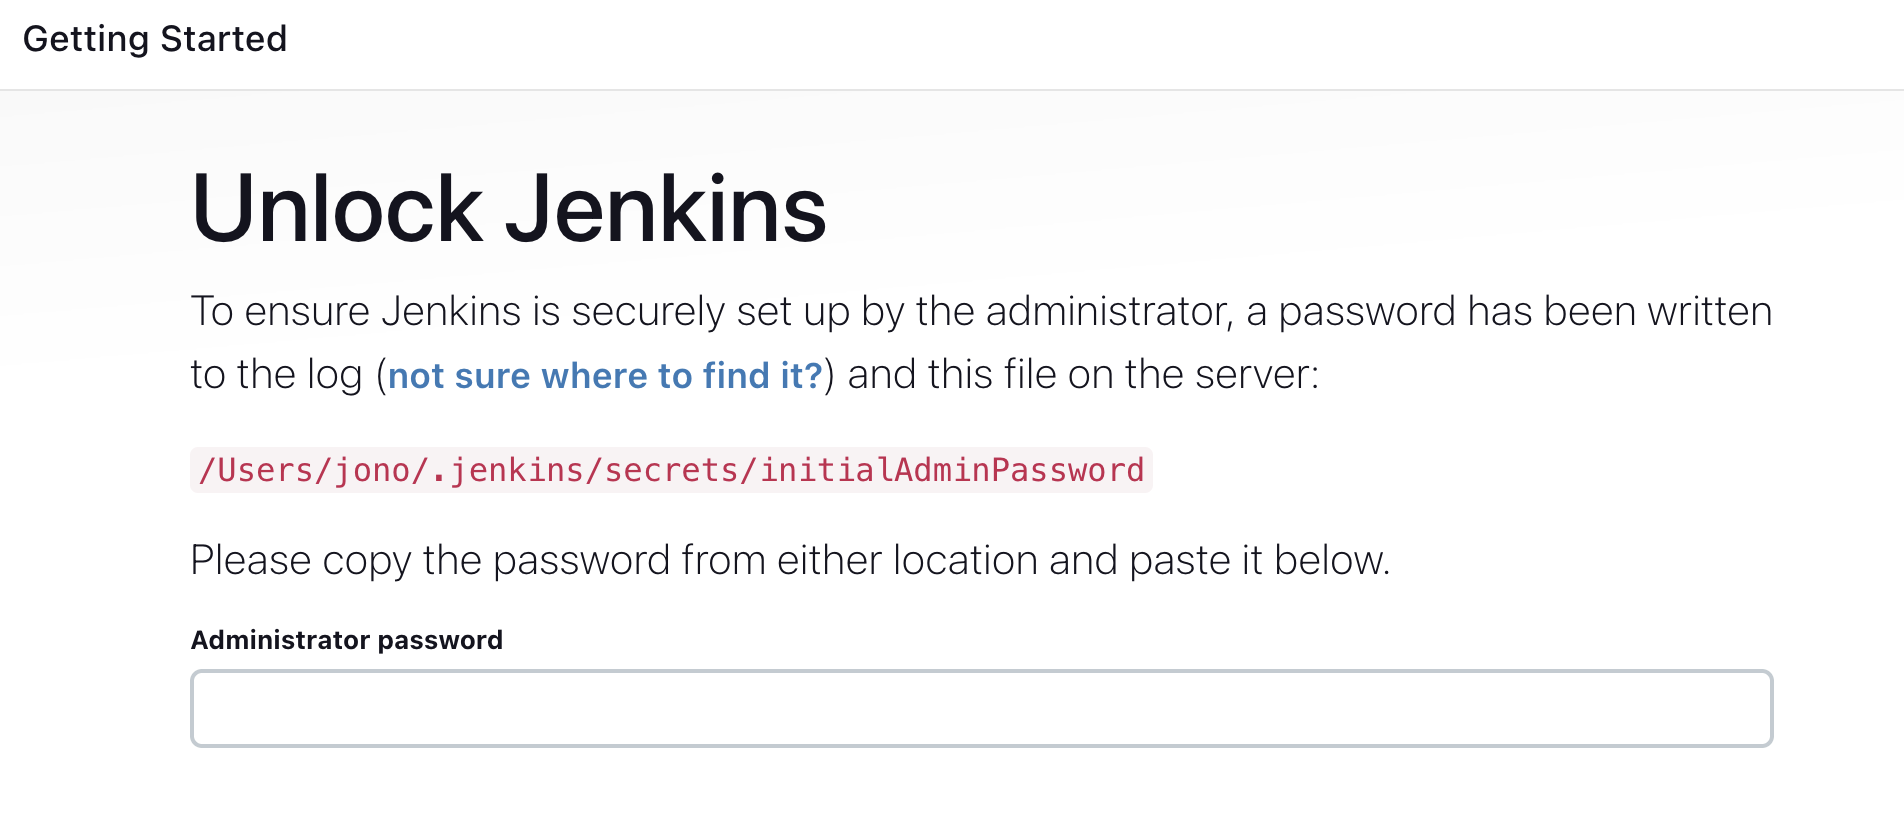
As Jenkins starts you can access it on your browser at http://localhost:8080 it might take a minute or two to get started. Once it’s loaded Jenkins will provide you with a two options to retrieve the path; from logs /var/log/jenkins/jenkins.log (on MacOS) or the location it displays on the page which is normally within the user profile /Users/jono/.jenkins/secrets/initialAdminPassword.
I started by selecting the option to install the most common community plugins instead of the select your own plugins install option. You can see on the left the plugins Jenkins is installing and on the right the status for each plugin that is being installed.

Once the plugins have finished installing there’ll be a prompt to create the first admin user but for the purpose of this exercise we can select “Skip and continue as admin”. We can also leave the instance configuration on the default localhost:8080 as well and then hit save and finish.

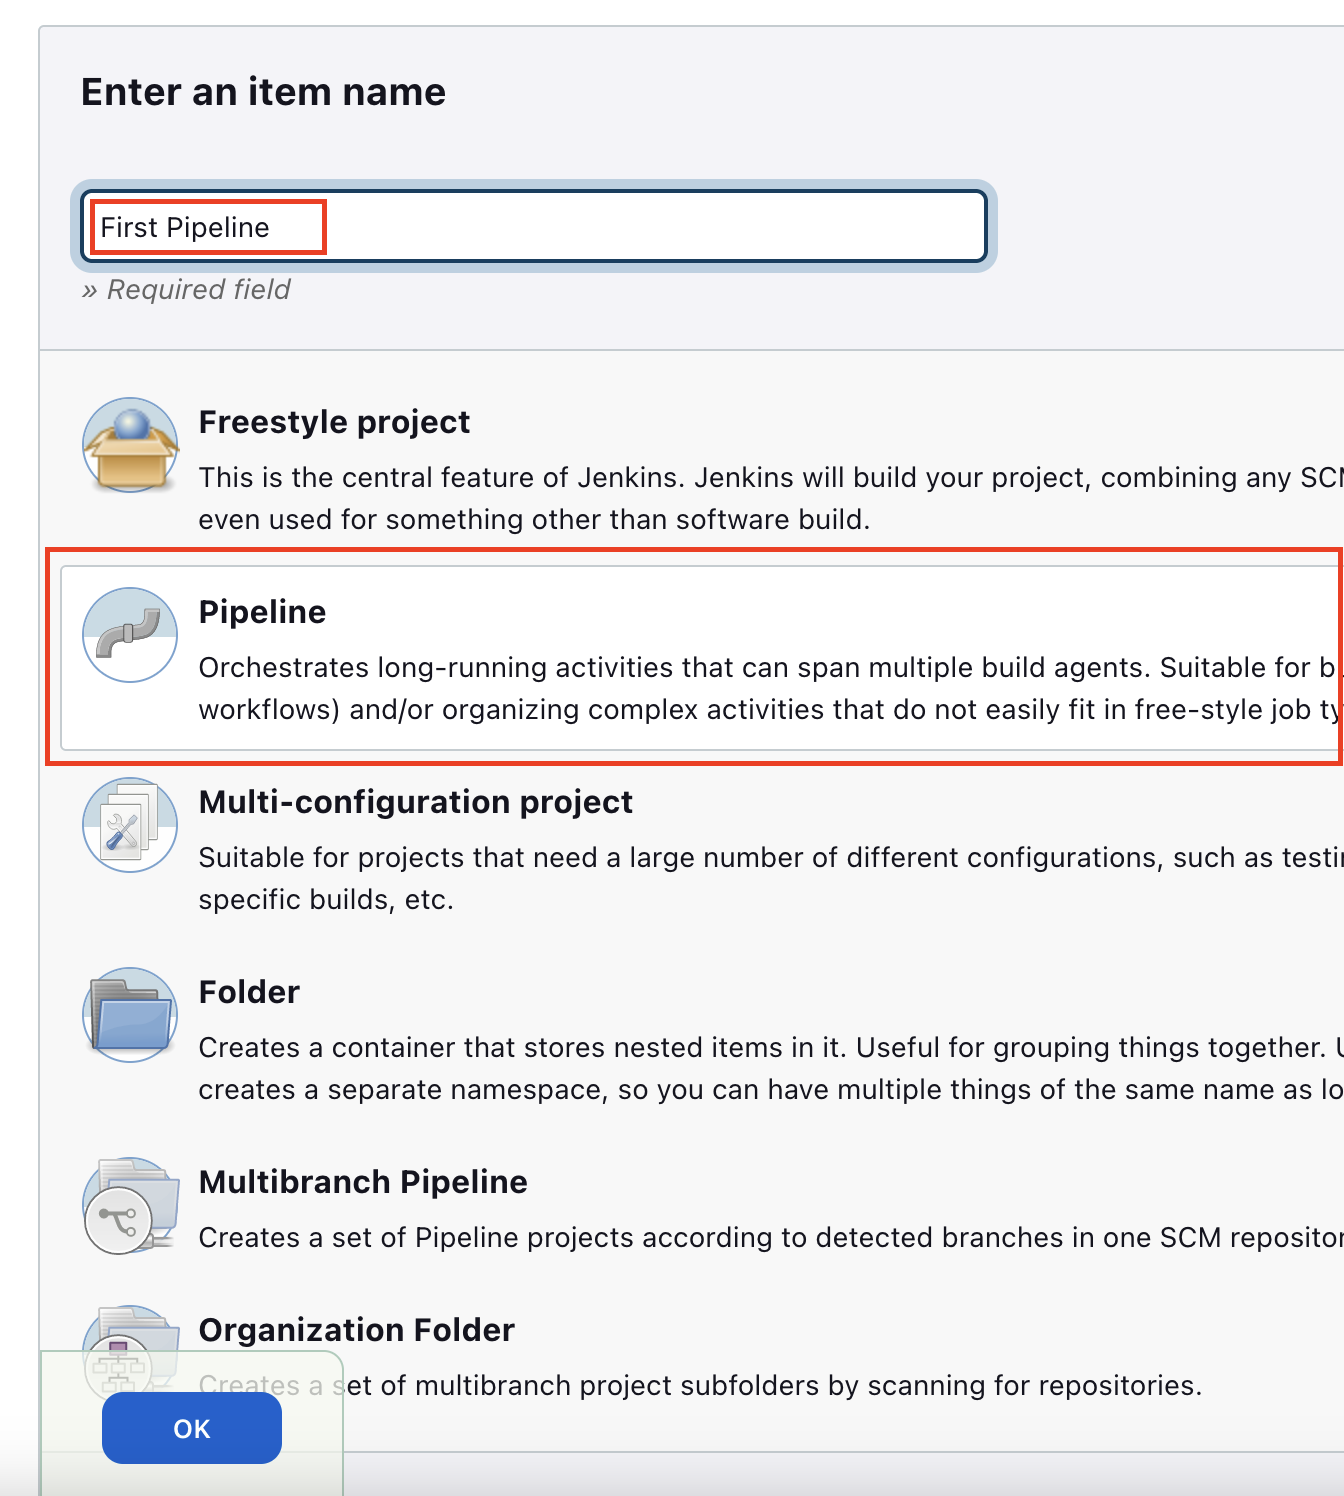
That’s it, Jenkins is set up! Select ‘Start using Jenkins’. Next on the dashboard navigate to the left hand menu and select “New item”, on the new item page enter a name for your pipeline like “First Pipeline” select the Pipeline item type then select OK.
On the next page there is a bunch of configuration that can be done but we’re going to keep it really simple. It’s a good idea to provide a brief description of what your pipeline will do in the description box, something like “My first pipeline, learning what pipelines do and how to set one up”. Let’s scroll all the way down to the “Pipeline” subheading and under Definition we’re going to change it from “Pipeline Script” to “Pipeline Script from SCM”
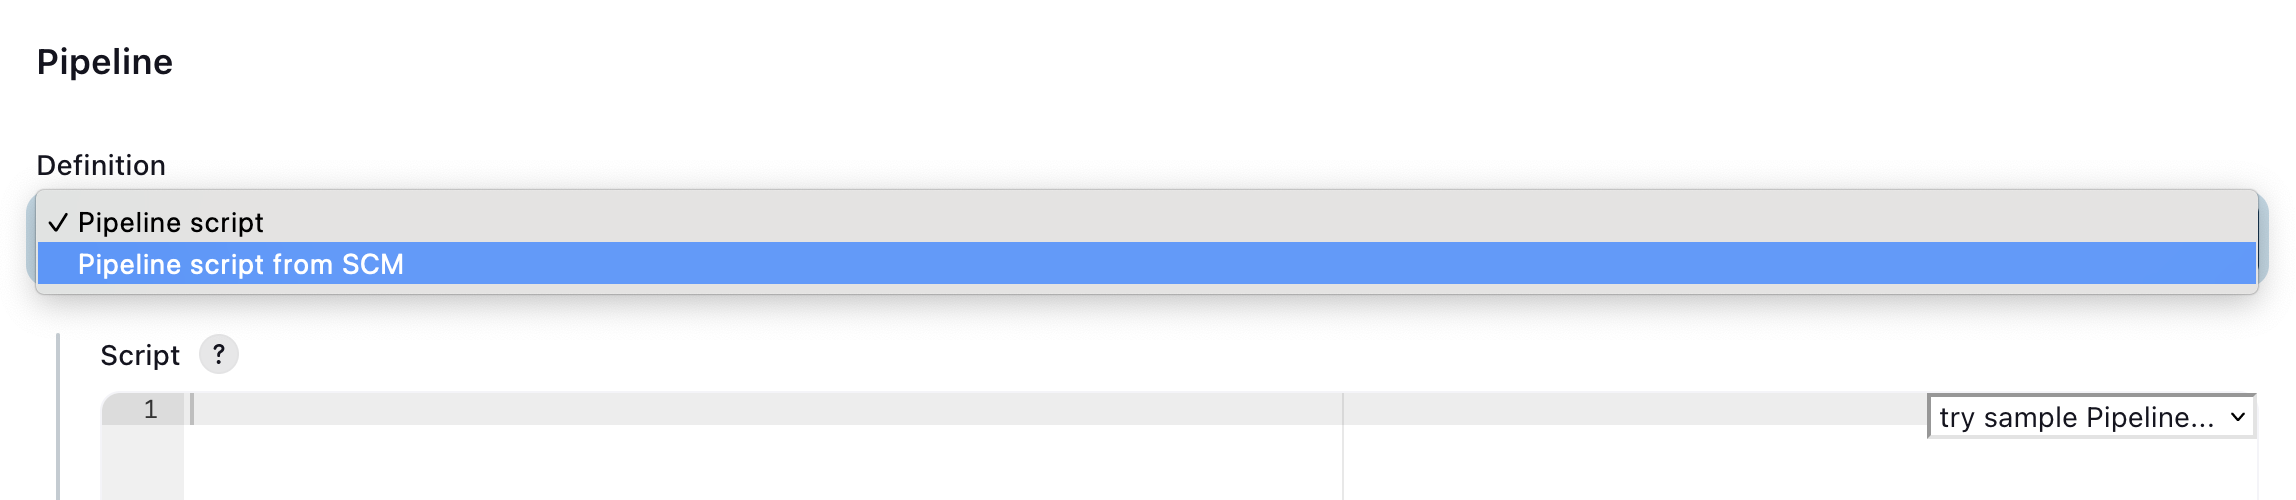
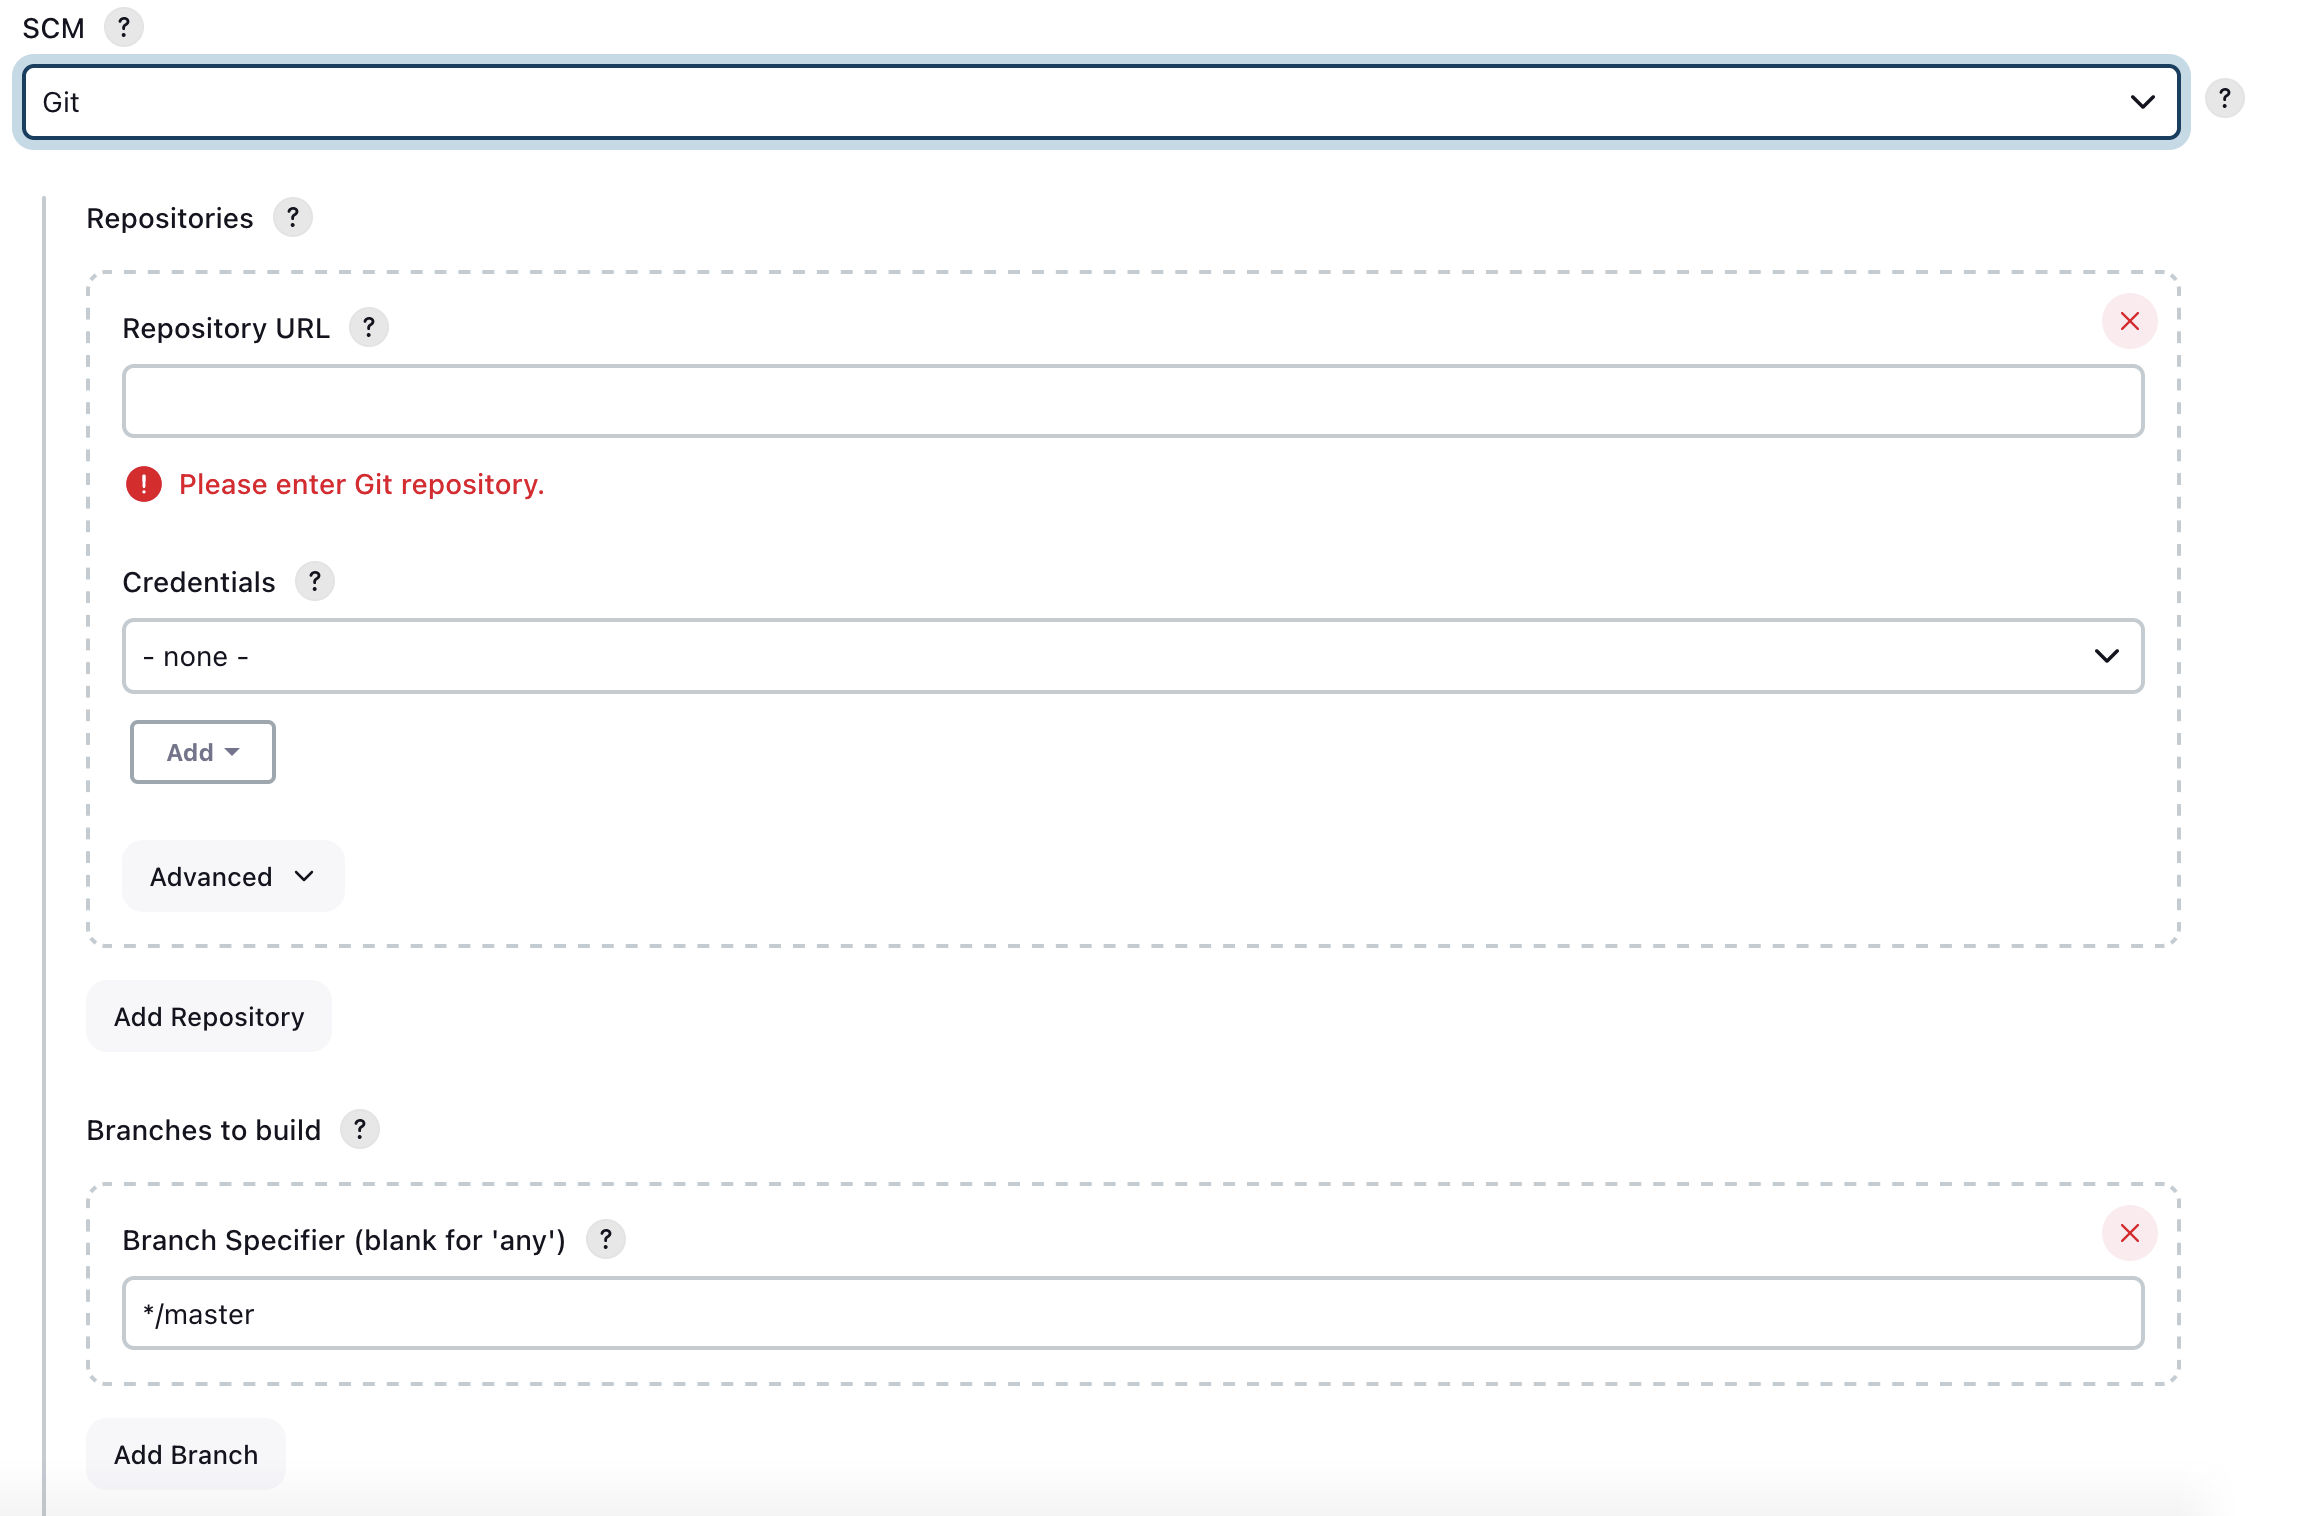
Under SCM select GIT and a number of options will appear for Repositories, branches and the Script path to the Jenkins file. Before we can fill out any of this information we’re going to need to create a Repo with a Jenkinsfile.
Creating our Repo
There are a few ways to create a git repo but I think the easiest way here is to create the repo in GitHub then clone it to your computer. It shouldn’t matter but I would skip initialising the repo with a readme.md and just create a blank repo. Once you’ve created the repo online navigate via cli to where you’d like the repo and clone it.
cd /Users/jono/Documents/repos/
git clone https://GitHub.com/MassoniMacaroni/jenkinsPipeline
cd jenkinsPipeline
Next we want to create our Jenkinsfile, the Jenkinsfile doesn’t have a specific file extension like .txt or .py. It’s simply named Jenkinsfile and is recognized by Jenkins based on this name. So depending how you best like to edit and create files create a file at the root of your directory and we’ll add in some declarative syntax.
This is the contents of what will be our pipeline file and needs to be added to a Jenkinsfile.txt.
pipeline {
    agent any

    stages {
        stage('Build') {
            steps {
                echo 'Building..'
            }
        }
        stage('Test') {
            steps {
                echo 'Testing..'
            }
        }
        stage('Deploy') {
            steps {
                echo 'Deploying....'
            }
        }
    }
}
I’m slowly trying to get better at Vim so I used the following.
vim Jenkinsfile.txt
# Ctrl + v
:wq
All this is doing is creating a file called Jenkinsfile.txt and opening it in the vim editor, from there we just paste the contents from above and exit Vim with a write and quit “:wq”.
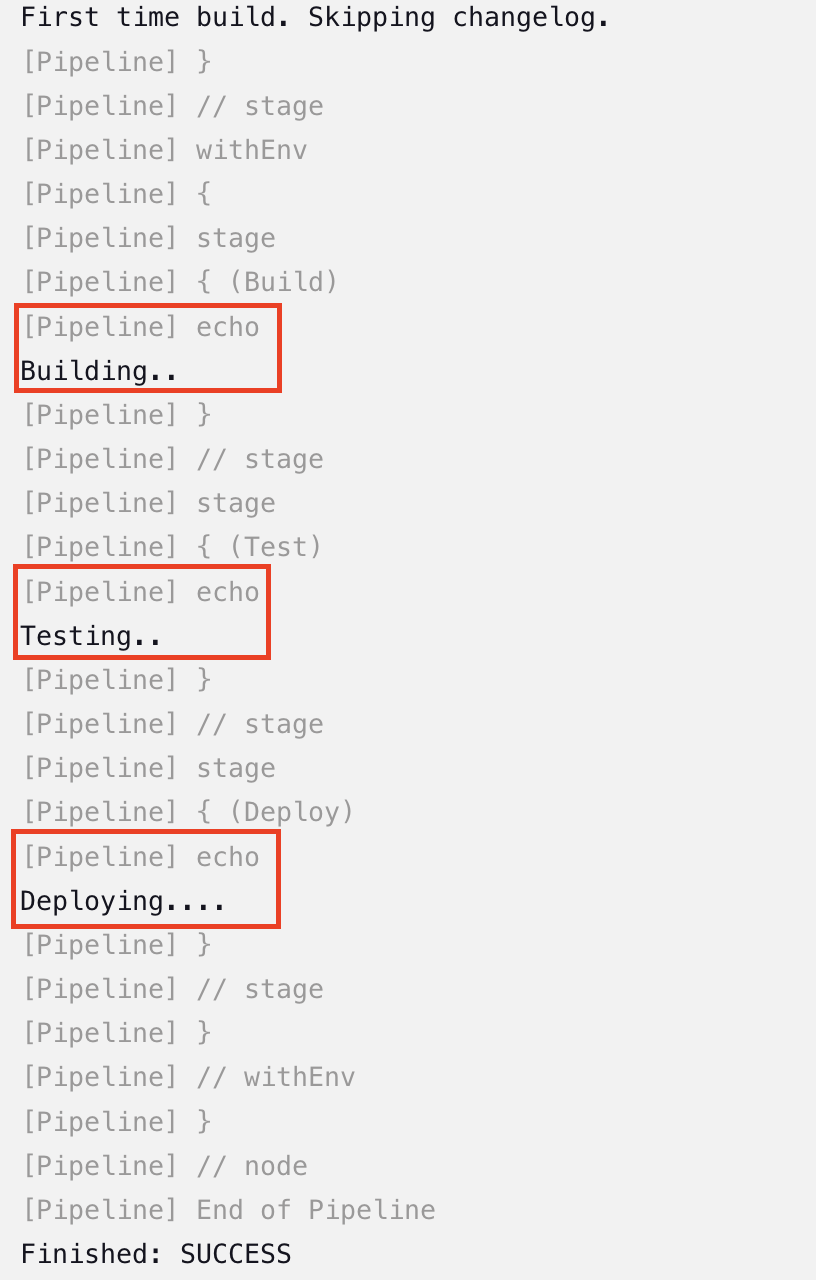
Our Jenkinsfile defines a simple Jenkins pipeline that has three stages: Build, Test, and Deploy. In each stage, it performs a basic action of printing a message to the console: “Building..”, “Testing..”, and “Deploying….” . The agent any directive allows this pipeline to run on any available agent in the Jenkins environment but we’re not concerned with Jenkins agents just yet.
Next we need to commit and push our changes back to our GitHub repo which is important because we’ll point our Jenkins Pipeline at the GitHub repo soon. Run the following from your git.
#Check for the untracked files to verify Jenkinsfile.txt is there
git status

#Stage the file changes to Jenkinsfile.txt
git add .

#Commit the files
git commit -m "Creation of initial Jenkinsfile"

#Push the files back up to GitHub
git push
Heading back to Jenkins
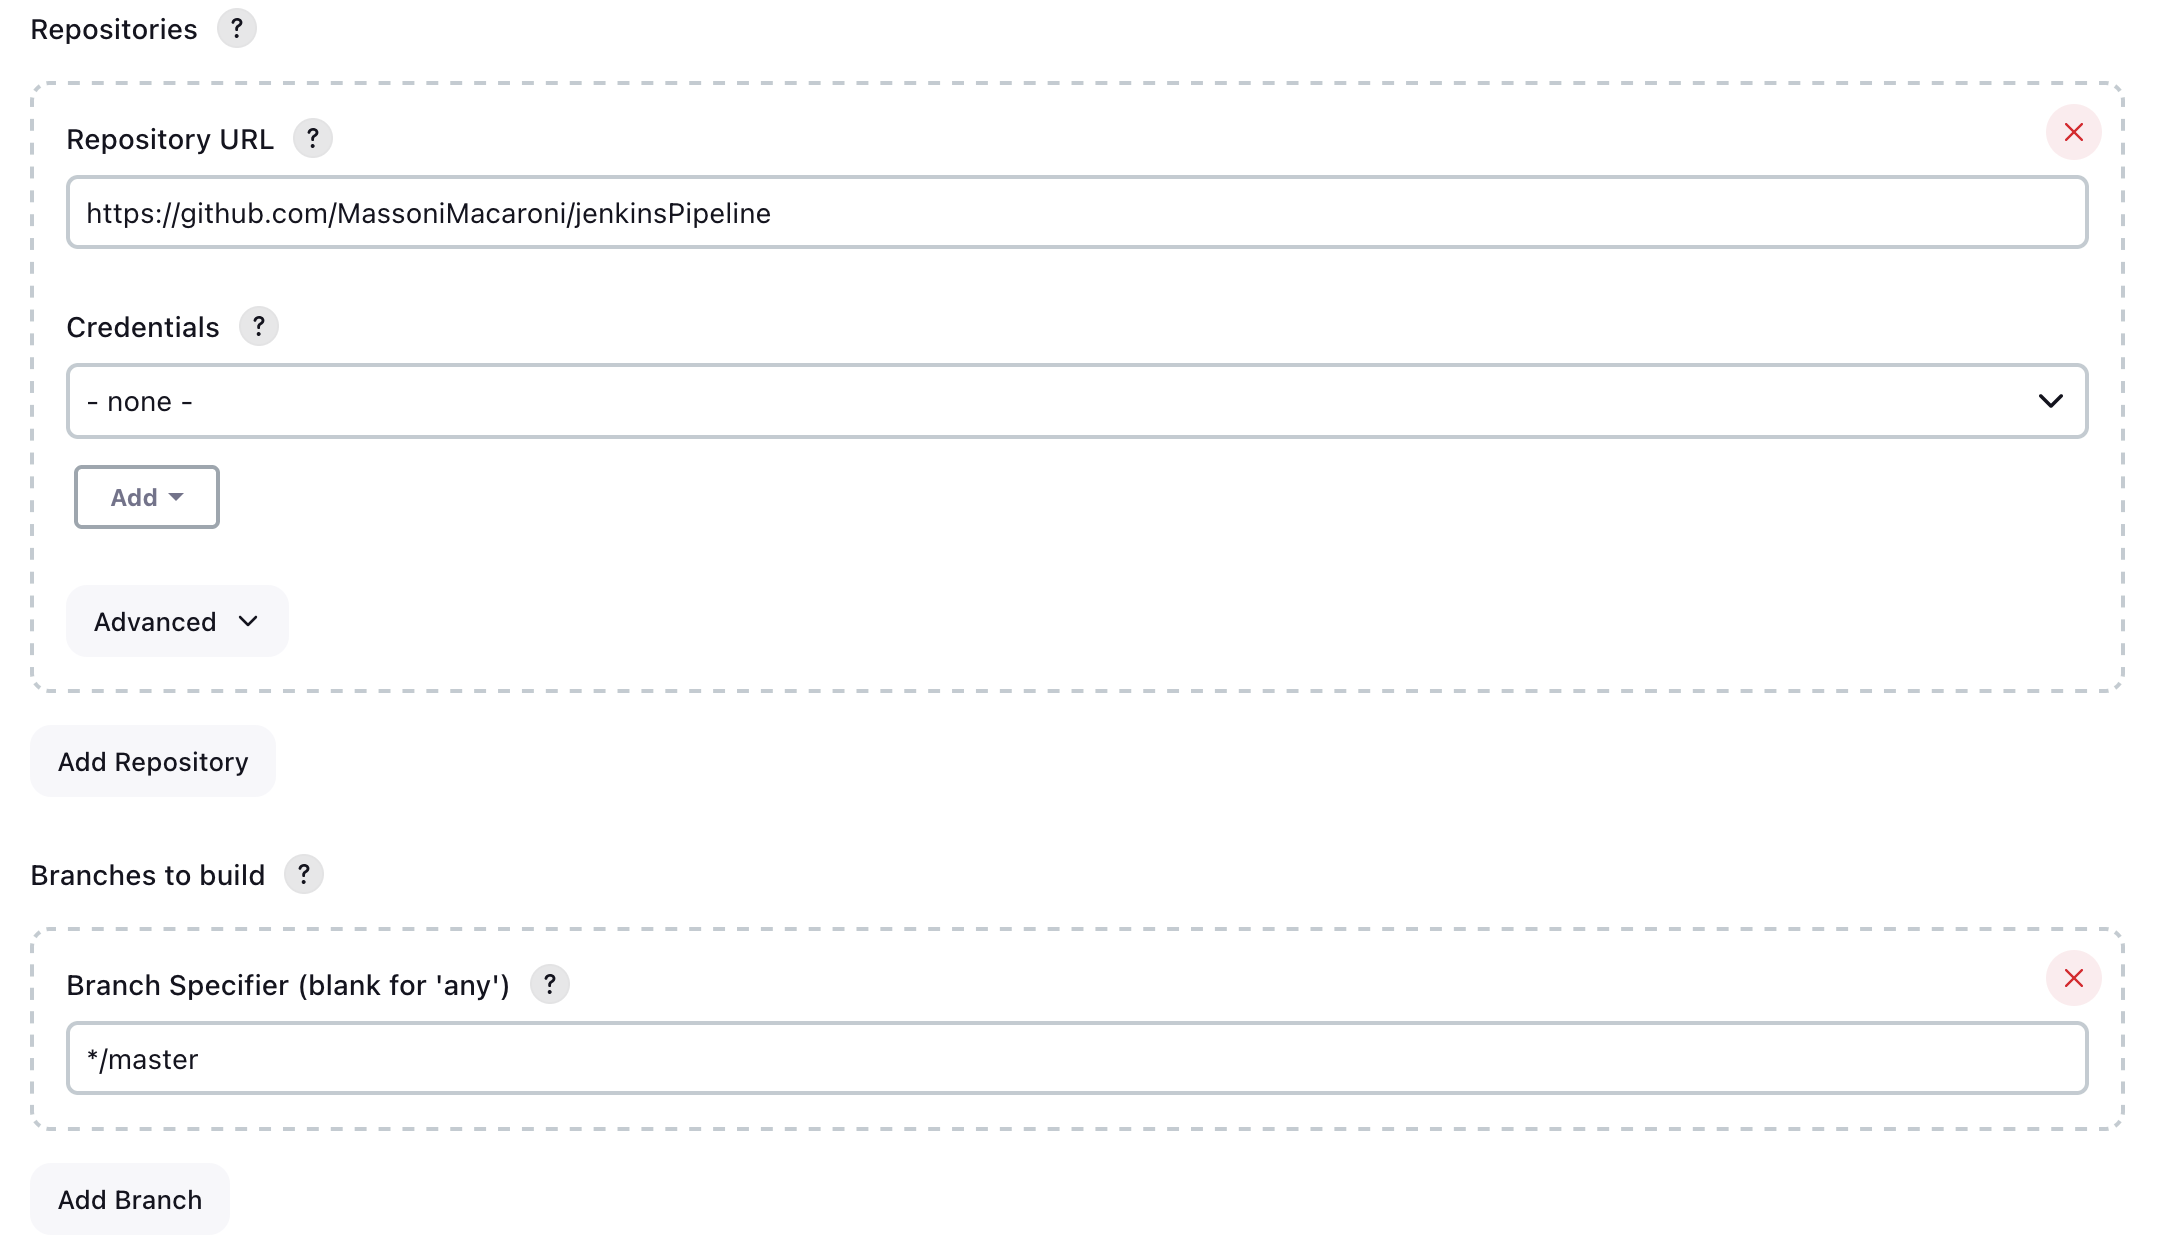
Back on our Jenkins page, we’ll need to fill out the repository information, our repo url will go directly to our git repo in my case https://GitHub.com/MassoniMacaroni/jenkinsPipeline. The rest of the settings can be left as default unless you’d like to set up additional credentials or use a branch other than the default */master.
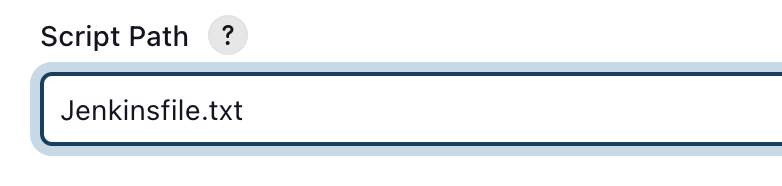
It’s very important to specify the exact name of your Jenkinsfile under the script path setting. In this example our Jenkinsfile is called “Jenkinsfile.txt”.
Next we can hit save and get ready to test our pipeline! On the Pipeline view for our new Pipeline hit “Build now” to test it out, it might take a second and a job #1 should appear towards the bottom left of your screen. We should also be able to the stages of our pipeline that have run and their time to run from this screen as well.
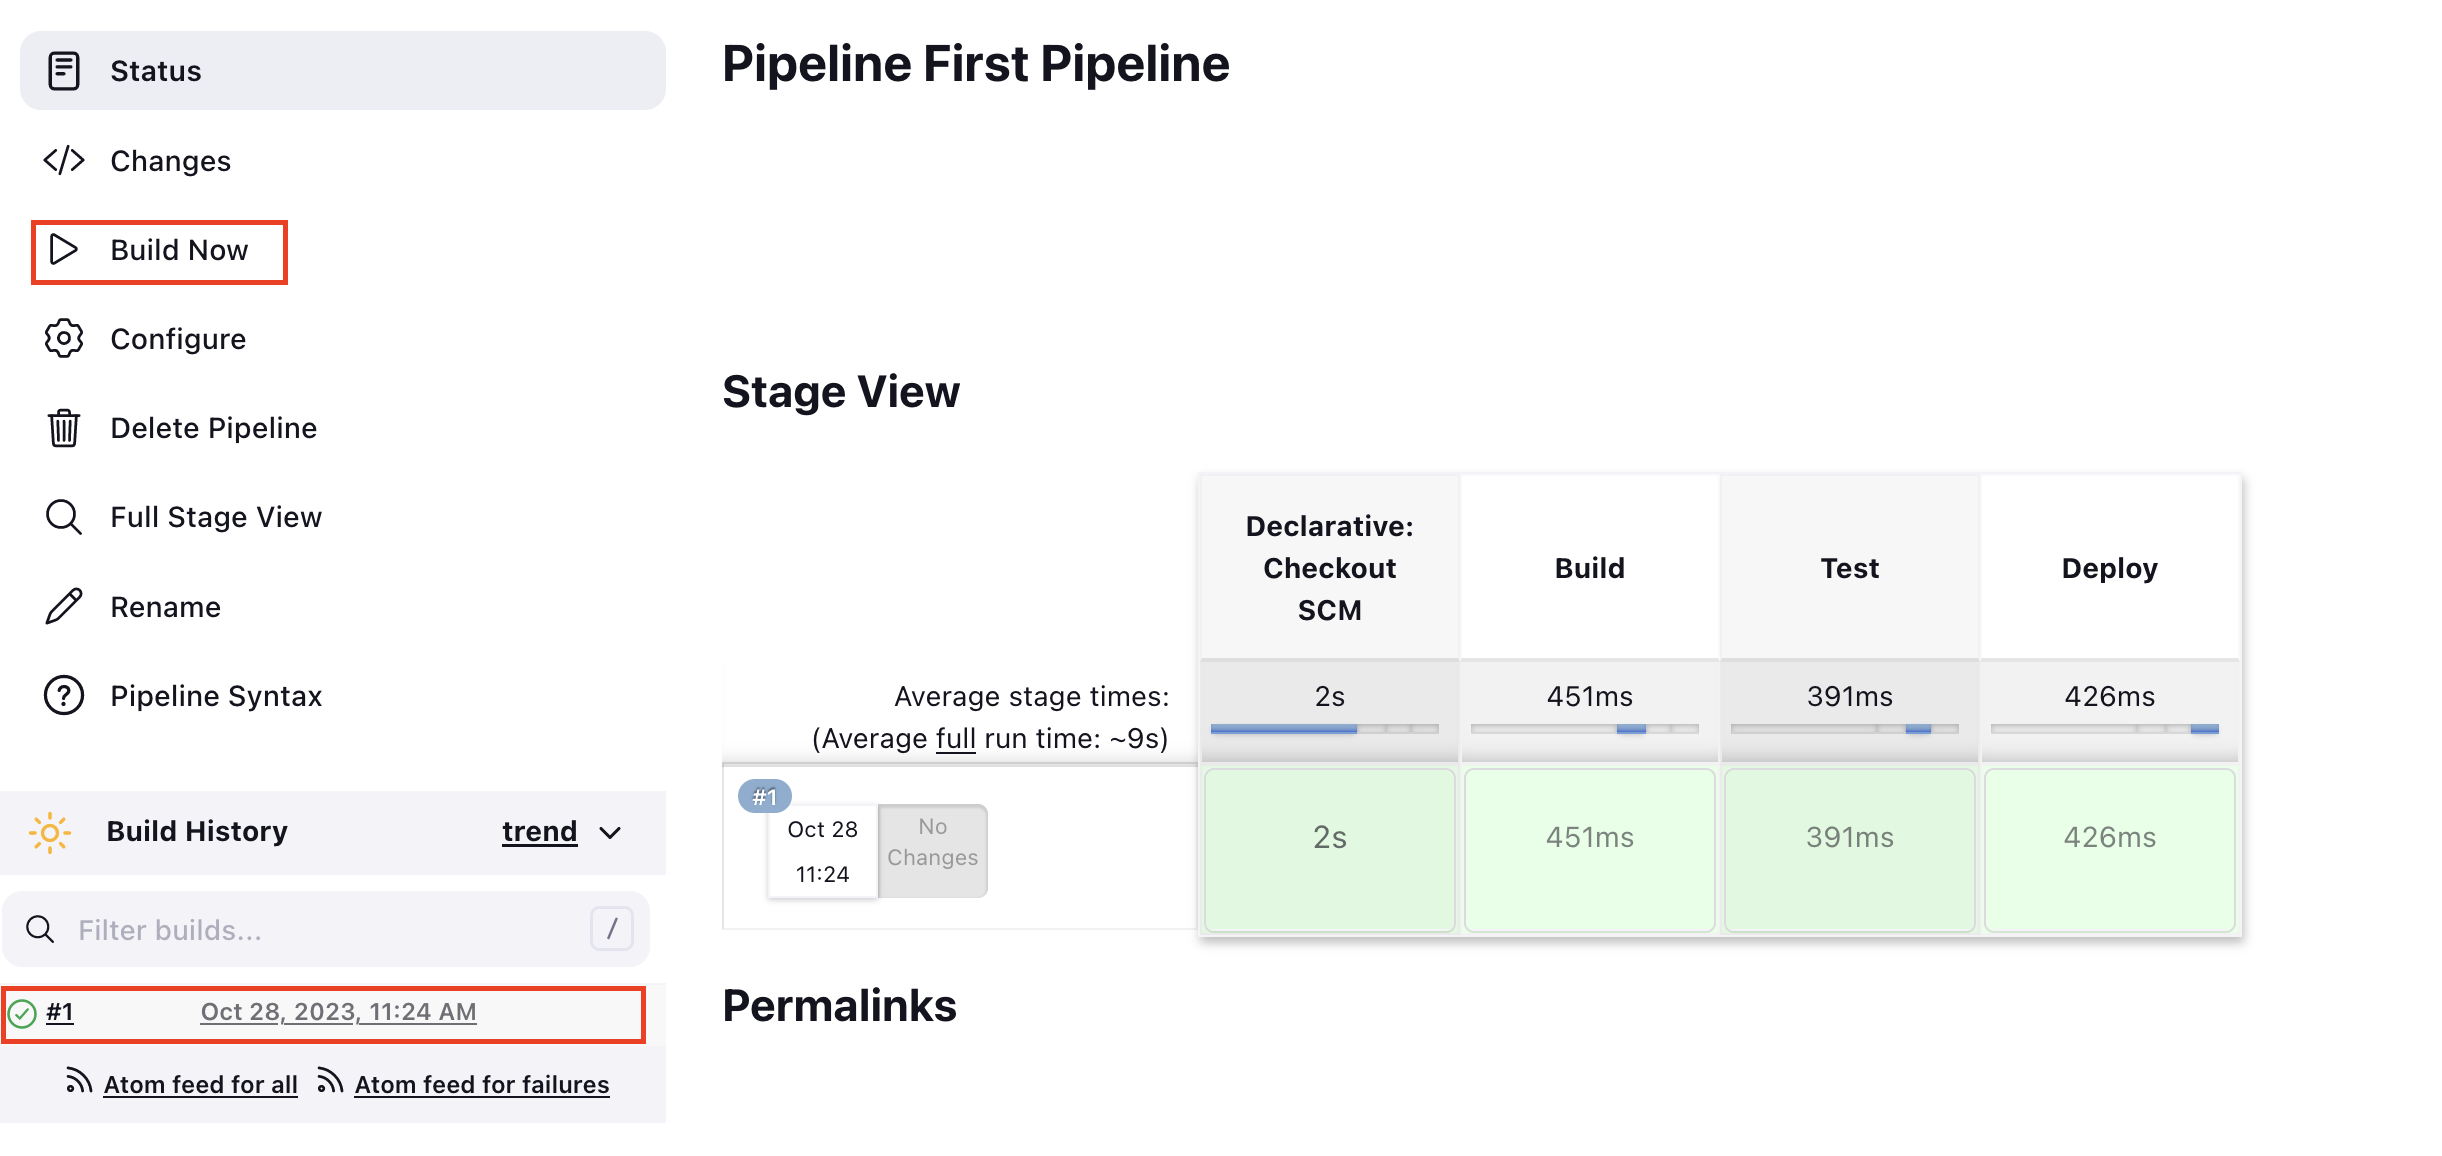
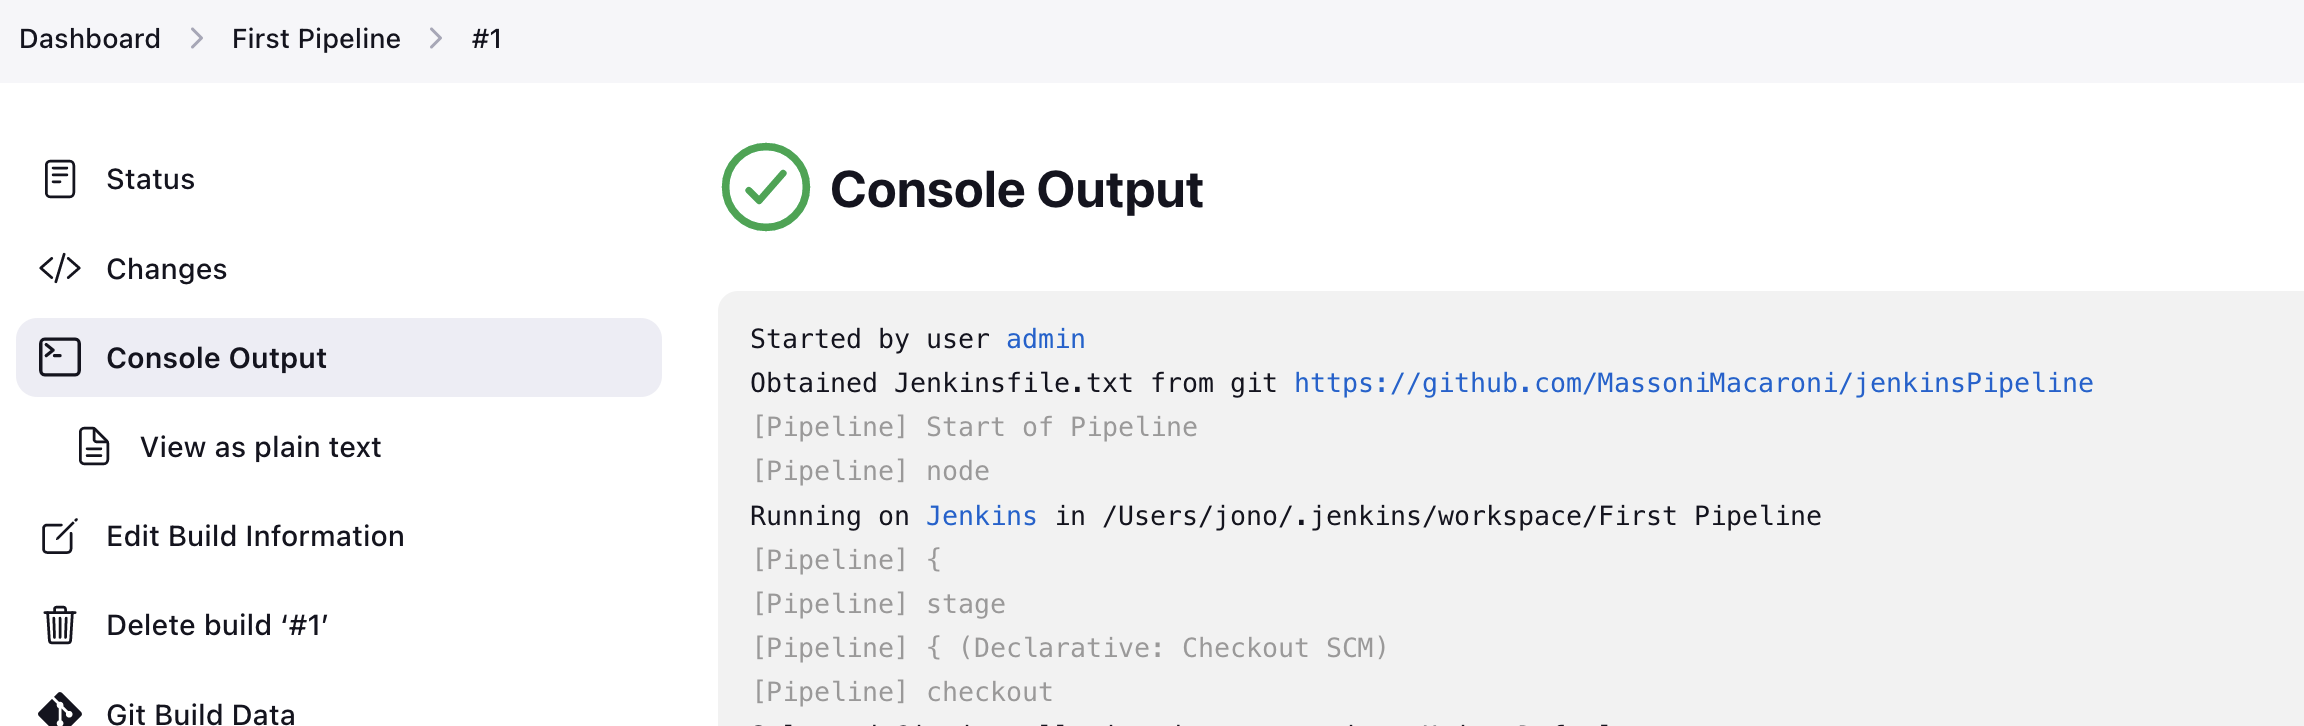
If we click on the build number #1 in the bottom left corner we can view more information about the build that just ran. Select Console Output and scroll down to see where the echo’s from our Pipeline script were executed.
There we have it, we’ve successfully dived into creating my first pipeline from scratch with Jenkins and Git. We set up a simple pipeline with three stages: Build, Test, and Deploy, to understand the automated flow of code from integration to deployment. Used a declarative Jenkinsfile, committed it to GitHub, and saw the pipeline in action in Jenkins. This small step into pipelines showcases the simplicity and effectiveness of automated workflows in modern development, making the process less daunting and more accessible.